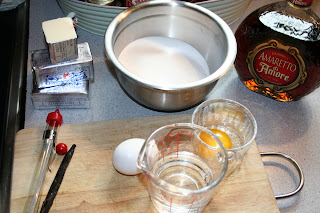
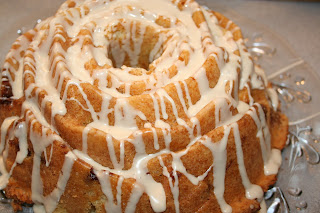
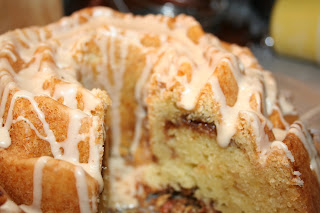
 I had never even heard of an Opera cake until this month! The flavor combinations were so hard to choose from and the idea of assembling this cake sounded like a LOT of fun. I chose Amaretto flavoring with added fresh Bing cherries.
 A HUGE hug to Ivonne, Lis, and co-hosts Fran and Shea for this fabulous new adventure! An Opera Cake. . .who would have thunk??! I have been working 6 days a week and finishing college stuff so put the challenge off till the very last. I really wish I could have squeezed it in sooner because I had a few questions to ask but instead, just pushed my way through. I melted chocolate again. . .two months in a row. Deep pride here! I may just get the hang of this yet. The buttercream frosting recipe was delicious, beautiful, and a keeper for upcoming cake baking events. I loved the creaminess and the vanilla bean seeds along with being able to flavor the frosting in any way that I can think of. A huge find! An almond cake base. How cool is that? I wonder what pistachio would taste like instead of almond? I am writing mental notes as I type. The top white chocolate glaze. . .was soooo thick and I had trouble smoothing the surface. I noticed in the Daring Baker Forum tonight that there are so many perfect looking Opera cakes! I guess I am going to have to investigate to find out what I did wrong. . .BUT the flavor of the overall cake is delicious! I am dying to bake this again when I can take a deep breath. I am going to have to look into the other flavor combinations that my team Daring Bakers have come up with to inspire my next attempt =D.
The new forum sure makes it easy to see how everyone else is doing and see what has been posted. What a great transition.
Thank you for another Wow Challenge! Here is the recipe as Posted by our wonderful hosts:
A Taste of Light: Opéra Cake
This recipe is based on Opéra Cake recipes in Dorie Greenspan’s Paris Sweets and Tish Boyle and Timothy Moriarty’s Chocolate Passion.
For the joconde
(Note: The joconde can be made up to 1 day in advance and kept wrapped at room temperate)
What you’ll need:
•2 12½ x 15½-inch (31 x 39-cm) jelly-roll pans
(Note: If you do not have jelly-roll pans this size, do not fear! You can use different-sized jelly-roll pans like 10 x 15-inches.)•a few tablespoons of melted butter (in addition to what’s called for in the ingredients’ list) and a brush (to grease the pans)
•parchment paper
•a whisk and a paddle attachment for a stand mixer or for a handheld mixer
•two mixing bowls (you can make do with one but it’s preferable to have two)
Ingredients:

6 large egg whites, at room temperature
2 tbsp. (30 grams) granulated sugar
2 cups (225 grams) ground blanched almonds (Note: If you do not want to use almond meal, you can use another nut meal like hazelnut. You can buy almond meal in bulk food stores or health food stores, or you can make it at home by grinding almonds in the food processor with a tablespoon or two of the flour that you would use in the cake. The reason you need the flour is to prevent the almonds from turning oily or pasty in the processor. You will need about 2 cups of blanched almonds to create enough almond meal for this cake.)

2 cups icing sugar, sifted
6 large eggs
½ cup (70 grams) all-purpose flour
3 tbsp. (1½ ounces; 45 grams) unsalted butter, melted and cooled
1.Divide the oven into thirds by positioning a rack in the upper third of the oven and the lower third of the oven.
2.Preheat the oven to 425◦F. (220◦C).
3.Line two 12½ x 15½- inch (31 x 39-cm) jelly-roll pans with parchment paper and brush with melted butter.
4.In the bowl of a stand mixer fitted with the whisk attachment (or using a handheld mixer), beat the egg whites until they form soft peaks. Add the granulated sugar and beat until the peaks are stiff and glossy. If you do not have another mixer bowl, gently scrape the meringue into another bowl and set aside.
5.If you only have one bowl, wash it after removing the egg whites or if you have a second bowl, use that one. Attach the paddle attachment to the stand mixer (or using a handheld mixer again) and beat the almonds, icing sugar and eggs on medium speed until light and voluminous, about 3 minutes.
6.Add the flour and beat on low speed until the flour is just combined (be very careful not to overmix here!!!).
7.Using a rubber spatula, gently fold the meringue into the almond mixture and then fold in the melted butter. Divide the batter between the pans and spread it evenly to cover the entire surface of each pan.
8.Bake the cake layers until they are lightly browned and just springy to the touch. This could
 take anywhere from 5 to 9 minutes depending on your oven. Place one jelly-roll pan in the middle of the oven and the second jelly-roll pan in the bottom third of the oven.
9.Put the pans on a heatproof counter and run a sharp knife along the edges of the cake to loosen it from the pan. Cover each with a sheet of parchment or wax paper, turn the pans over, and unmold.
10.Carefully peel away the parchment, then turn the parchment over and use it to cover the cakes. Let the cakes cool to room temperature.
For the syrup
(Note: The syrup can be made up to 1 week in advance and kept covered in the refrigerator.)
What you’ll need:
•a small saucepan
Ingredients:
½ cup (125 grams) water
⅓ cup (65 grams) granulated sugar
1 to 2 tbsp. of the flavouring of your choice (i.e., vanilla extract, almond extract, cognac, limoncello, coconut cream, honey etc.)
1.Stir all the syrup ingredients together in the saucepan and bring to a boil.
2.Remove from the heat and let cool to room temperature.
For the buttercream
(Note: The buttercream can be made up to 1 month in advance and packed in an airtight container. If made way in advance, you can freeze the buttercream. Alternatively you can refrigerate it for up to 4 days after making it. To use the buttercream simply bring it to room temperature and then beat it briefly to restore its consistency.)
(Update Note: The recipe for the buttercream that is listed below was originally based on the original but we had some typos. It's all very confusing (we're good at confusing ourselves) but here is the short of it: When testing the buttercream, we tested a modified version (we're crazy like that!!!) that had 2 cups sugar, ½ cup water and 1¾ cups butter. Yes. That's right. 1¾ cups of butter. The eggs remained the same. We ended up with a very creamy buttercream. VERY. CREAMY. But we don’t want anyone to be afraid of our modified version so you have the option of using the original version listed below or the quantities we’ve listed here in this note. If you are still confused and want to cry, then please e-mail us and we will comfort you!!! We promise!!!)
What you’ll need:
•a small saucepan
•a candy or instant-read thermometer
•a stand mixer or handheld mixer
•a bowl and a whisk attachment
•rubber spatula
Ingredients:

1 cup (100 grams) granulated sugar
¼ cup (60 grams) water seeds of one vanilla bean (split a vanilla bean down the middle and scrape out the seeds) or 1 tbsp. pure vanilla extract (Note: If you are flavouring your buttercream and do not want to use the vanilla, you do not have to. Vanilla will often enhance other flavours but if you want an intense, one-flavoured buttercream, then by all means leave it out!)
1 large egg
1 large egg yolk
1¾ sticks (7 ounces; 200 grams) unsalted butter, at room temperature
flavouring of your choice (a tablespoon of an extract, a few tablespoons of melted white chocolate, citrus zest, etc.)
1.Combine the sugar, water and vanilla bean seeds or extract in a small saucepan and warm over
 medium heat just until the sugar dissolves.
2.Continue to cook, without stirring, until the syrup reaches 225◦F (107◦C) [*Note: Original recipe indicates a temperature of 255◦F (124◦C), however, when testing the recipe I found that this was too high so we heated to 225◦F and it worked fine] on a candy or instant-read thermometer. Once it reaches that temperature, remove the syrup from the heat.
3.While the syrup is heating, begin whisking the egg and egg yolk at high speed in the bowl of your mixer using the whisk attachment. Whisk them until they are pale and foamy.
4.When the sugar syrup reaches the correct temperature and you remove it from the heat, reduce the mixer speed to low speed and begin slowly (very slowly) pouring the syrup down the side of the bowl being very careful not to splatter the syrup into the path of the whisk attachment. Some of the syrup will spin onto the sides of the bowl but don’t worry about this and don’t try to stir it into the mixture as it will harden!
5.Raise the speed to medium-high and continue beating until the eggs are thick and satiny and the mixture is cool to the touch (about 5 minutes or so).
6.While the egg mixture is beating, place the softened butter in a bowl and mash it with a spatula until you have a soft creamy mass.
7.With the mixer on medium speed, begin adding in two-tablespoon chunks. When all the butter has been incorporated, raise the mixer speed to high and beat until the buttercream is thick and shiny.

8.At this point add in your flavouring and beat for an additional minute or so.
9.Refrigerate the buttercream, stirring it often, until it’s set enough (firm enough) to spread when topped with a layer of cake (about 20 minutes).
For the white chocolate ganache/mousse
(this step is optional – please see Elements of an Opéra Cake below) (Note: The mousse can be made ahead and refrigerated until you’re ready to use it.)
What you’ll need:
•a small saucepan
•a mixer or handheld mixer
Ingredients:
7 ounces white chocolate
1 cup plus 3 tbsp. heavy cream (35% cream)
1 tbsp. liquer of your choice (Bailey’s, Amaretto, etc.)
1.Melt the white chocolate and the 3 tbsp. of heavy cream in a small saucepan.
2.Stir to ensure that it’s smooth and that the chocolate is melted. Add the tablespoon of liqueur to the chocolate and stir. Set aside to cool completely.
3.In the bowl of a stand mixer, whip the remaining 1 cup of heavy cream until soft peaks form.
4.Gently fold the whipped cream into the cooled chocolate to form a mousse.
5.If it’s too thin, refrigerate it for a bit until it’s spreadable.
6.If you’re not going to use it right away, refrigerate until you’re ready to use.
For the glaze
(Note: It’s best to make the glaze right when you’re ready to finish the cake.)
What you’ll need:
•a small saucepan or double boiler
Ingredients:
14 ounces white chocolate, coarsely chopped
½ cup heavy cream (35% cream)
1.Melt the white chocolate with the heavy cream. Whisk the mixture gently until smooth.
2.Let cool for 10 minutes and then pour over the chilled cake. Using a long metal cake spatula, smooth out into an even layer.
3.Place the cake into the refrigerator for 30 minutes to set.
Assembling the Opéra Cake
(Note: The finished cake should be served slightly chilled. It can be kept in the refrigerator for up to 1 day).
Line a baking sheet with parchment or wax paper.
Working with one sheet of cake at a time, cut and trim each sheet so that you have two pieces (from each cake so you’ll have four pieces in total): one 10-inch (25-cm) square and one 10 x 5-inch (25 x 12½-cm) rectangle.
Step A (if using buttercream only and not making the ganache/mousse):
Place one square of cake on the baking sheet and moisten it gently with the flavoured syrup.
Spread about one-third of the buttercream over this layer.Top with the two rectangular pieces of cake, placing them side by side to form a square. Moisten these pieces with the flavoured syrup.Spread another third of the buttercream on the cake and then top with the third square of joconde. Use the remaining syrup to wet the joconde. Spread the remaining buttercream on top of the final layer of joconde and then refrigerate until very firm (at least half an hour).
Make the glaze and after it has cooled, pour/spread it over the top of the chilled cake. Refrigerate the cake again to set the glaze.
Serve the cake slightly chilled. This recipe will yield approximately 20 servings.
Step B (if making the ganache/mousse):

Place one square of cake on the baking sheet and moisten it gently with the flavoured syrup.
Spread about three-quarters of the buttercream over this layer.
Top with the two rectangular pieces of cake, placing them side by side to form a square. Moisten these pieces with the flavoured syrup.
Spread the remaining buttercream on the cake and then top with the third square of joconde. Use the remaining syrup to wet the joconde and then refrigerate until very firm (at least half an hour).
Prepare the ganache/mousse (if you haven’t already) and then spread it on the top of the last layer of the joconde. Refrigerate for at least two to three hours to give the ganache/mousse the opportunity to firm up.
Make the glaze and after it has cooled, pour/spread it over the top of the chilled cake. Refrigerate the cake again to set the glaze.
Serve the cake slightly chilled. This recipe will yield approximately 20 servings.

 I am grateful that even with all the crazy, cold weather, my spring bulbs still managed to survive. I think a peaceful afternoon should always consist of a stroll through your flowers. The fragileness and beauty is always so uplifting. Dinner instantly goes from leftovers to making something a little more innovative. . .even if that means a fresh casserole. And then there is dessert.


 Zena is my friend's Grouprecipe name and a few of us at this site got on the bandwagon for trying Zena's carrot cake. I honestly never thought anyone could come close to beating my own


